


Welcome to the latest article of our 'Ethereum Essentials' series, where we embark on a continuous exploration of the Ethereum ecosystem. In our previous article, we delved into the realm of Smart Contracts. Today, we are taking the next significant leap in our Ethereum journey as we dive headfirst into the world of DApps (Decentralized Applications).
In the world of blockchain technology and cryptocurrencies, the term "DApp" is frequently thrown around. What exactly are Decentralized Applications, or DApps, and how do they differ from traditional applications? In this comprehensive guide, we will unravel the intricate world of DApps, exploring their definition, architecture, and how to create our own DApp.
What are DApps?
At its core, a Decentralized Application, often referred to as a DApp, represents a novel approach to software applications. These applications function within a decentralized network, typically powered by blockchain technology. What sets DApps apart is their design principle of being "trustless."
This means they are fundamentally distinct from traditional applications in how they operate, relying on neither a central authority nor an intermediary for their functionality. Instead, DApps harness the power of smart contracts and decentralized consensus mechanisms to carry out their operations.
To better appreciate this distinction, let's draw an analogy between DApps and traditional applications. Imagine traditional applications as a well-known video-sharing platform, such as YouTube. In the case of YouTube, the platform holds centralized control over all content, and content creators rely on the platform to host and distribute their videos securely.
Now, picture DApps as a community-driven, decentralized video-sharing platform. In this decentralized platform, there's no central entity, like YouTube, overseeing the content. Instead, videos are uploaded to a shared ledger, much like a blockchain, accessible to all participants in the network. This ledger maintains a transparent and immutable record of all video uploads and interactions.
The Underlying Blockchain Technology
The critical difference here is that in the decentralized video-sharing platform (representing DApps), you don't need to place trust in a single, centralized entity like YouTube. Instead, trust is distributed across the network, and video uploads, views, and interactions occur through smart contracts. These smart contracts serve as self-executing agreements with predefined rules, ensuring that content distribution and interactions are carried out automatically and transparently, without the need for a trusted intermediary.
The Architecture of DApps

DApps consist of the following components:
Front-end (User Interface) - The front-end is the user interface where users interact with the DApp. It provides a user-friendly, platform-specific interface (e.g., web, mobile, desktop) for users to access and use the application's features.
Wallets - Wallets are integral to DApps, facilitating user interaction with blockchain-based applications. Users choose their preferred wallet (e.g., Metamask, Trust Wallet) and connect it to the DApp's front end. The wallet requests authorization to operate on the user's behalf, and upon approval, it securely stores the user's private keys. When a user initiates an action within the DApp, the wallet signs the resulting transaction using the private keys. Essentially, wallets act as the secure link between users and DApps, ensuring transaction security and seamless access to decentralized applications.
Node Providers - Node Providers host and maintain blockchain nodes on their infrastructure. These nodes are responsible for processing and validating transactions, storing the blockchain's data, and maintaining the network's state. By hosting nodes, node providers like Alchemy eliminate the need for DApp developers to set up and manage their nodes, which can be resource-intensive and technically challenging.
DApps use JSON-RPC to communicate with the nodes, making queries, and requesting various operations on the Ethereum blockchain. JSON-RPC is a lightweight and widely used protocol that allows DApps to send requests to a blockchain node and receive responses in JSON format.
Smart Contracts: Smart contracts define the rules and logic of the DApp. Smart contracts automate processes, execute transactions, and enforce the DApp's functionality without the need for intermediaries.
Back-end: The back-end comprises off-chain components, including databases, servers, and APIs. It supports the DApp's functionality by handling user authentication, data storage, and off-chain processing. It ensures smooth DApp operation while interfacing with the blockchain when necessary.
Deploying Smart Contract
In our previous article, we discussed how to create a Counter Smart Contract and deploy it on the Sepolia Testnet. For the upcoming DApp development, we will refer to that article to deploy the contract, or you can use the address and ABI of the contract I deployed.
After deployment, to find the contract Address refer to the image below. Now we have an address of 0xD6C75129000e58879D41913f9e0A34c232CfBB7E.

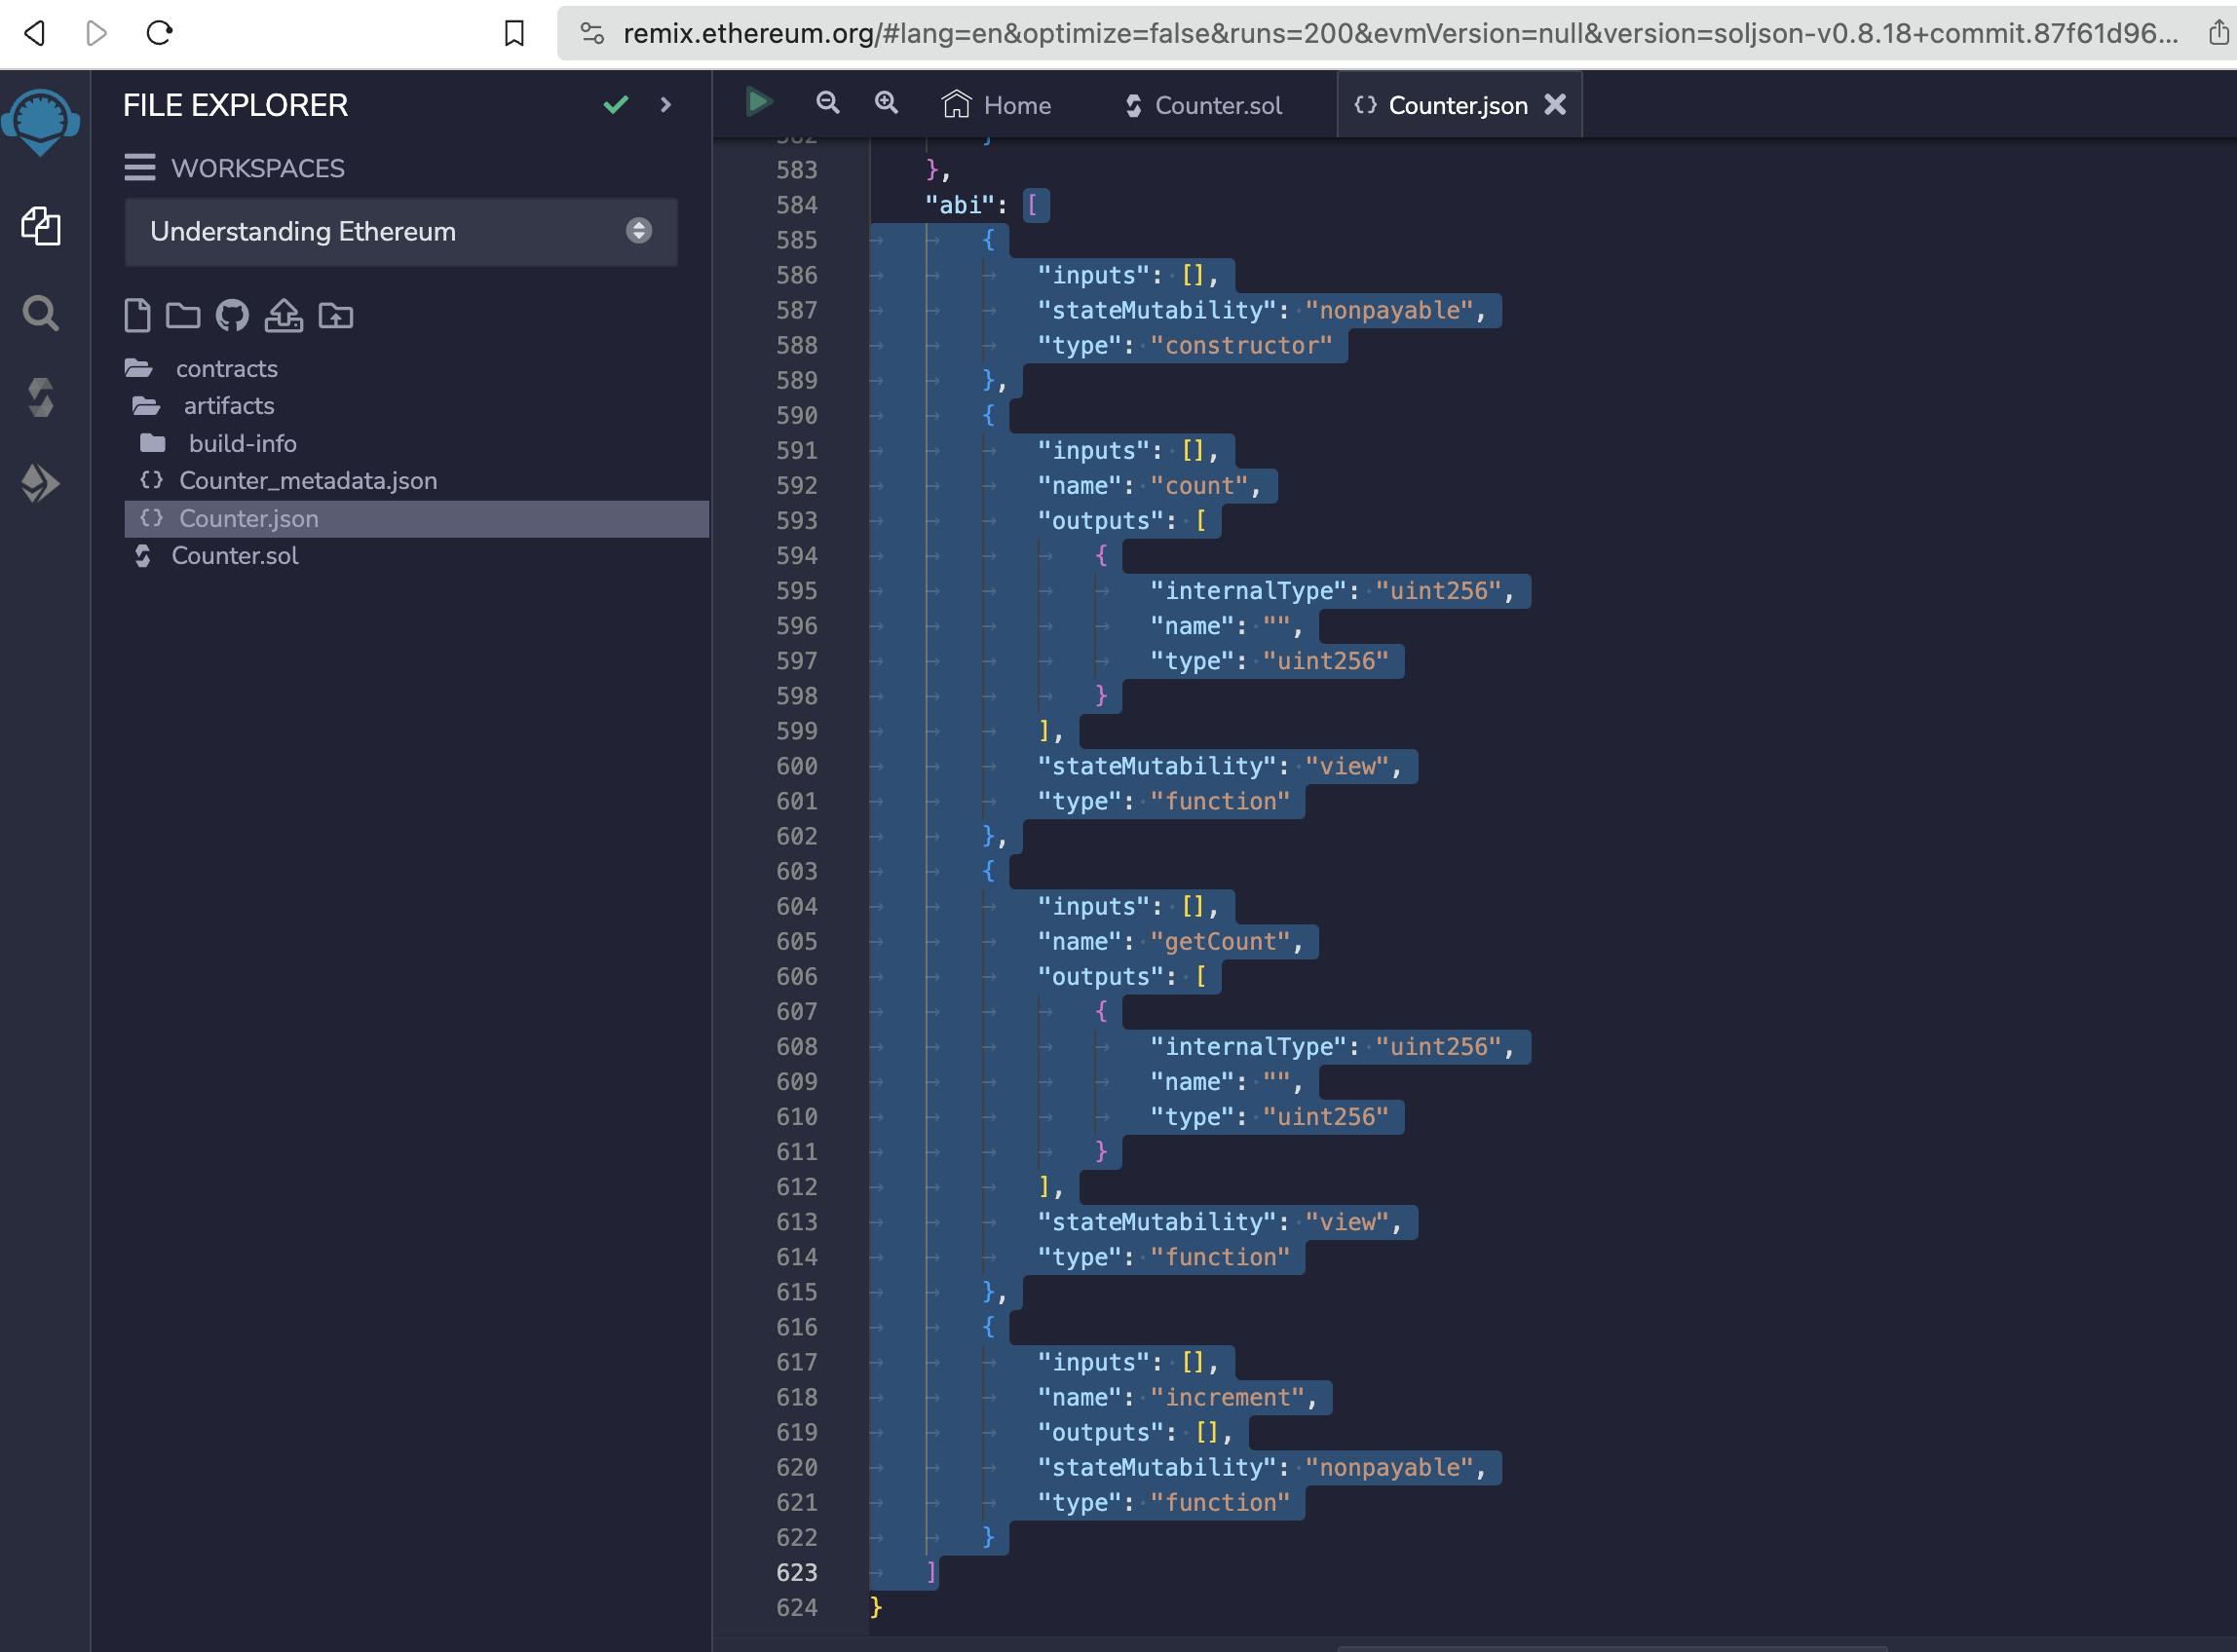
It's important to note that Remix generates the ABI for your smart contract during the deployment process. You can locate the ABI array within the "artifacts" folder under "Counter.json," typically around line number 584.
Writing our First Dapp
Set Up Your Development Environment - Make sure you have Node.js and npm (Node Package Manager) installed on your machine. If not, you can download them from nodejs.org
Create a New React Project - Open your terminal and create a new React project using Create React App
 npx create-react-app dapp-counter
 cd dapp-counter
Install Dependencies - Ethers and Web3.js are two popular JavaScript libraries which significantly reduce the complexities of interacting with the Ethereum blockchain through JSON-RPC by providing higher-level abstractions and developer-friendly APIs. There are more advanced libraries like ThirdWeb, which we will cover in the upcoming posts.
npm install ethersCreate a Smart Contract Instance - In your React application in the
srcfolder, create a file namedContract.jsto handle the interaction with the smart contract.import { ethers } from 'ethers'; const contractAddress = '0xD6C75129000e58879D41913f9e0A34c232CfBB7E'; // Replace with your deployed contract address const contractAbi = [ { "inputs": [], "stateMutability": "nonpayable", "type": "constructor" }, { "inputs": [], "name": "count", "outputs": [ { "internalType": "uint256", "name": "", "type": "uint256" } ], "stateMutability": "view", "type": "function" }, { "inputs": [], "name": "getCount", "outputs": [ { "internalType": "uint256", "name": "", "type": "uint256" } ], "stateMutability": "view", "type": "function" }, { "inputs": [], "name": "increment", "outputs": [], "stateMutability": "nonpayable", "type": "function" } ]; // We are using the wallet (Metamask) as our RPC Provider const provider = new ethers.BrowserProvider(window.ethereum); const signer = await provider.getSigner(); // To create a instance of the contract const contract = new ethers.Contract(contractAddress, contractAbi, signer); export default contract;Create a React Component - Create a new React component (e.g.,
CounterApp.js) to interact with the smart contract:import React, { useEffect, useState } from 'react'; import contract from './Contract'; function CounterApp() { const [count, setCount] = useState(0); async function getCount() { const currentCount = await contract.getCount(); setCount(Number(currentCount)); } useEffect(() => { getCount(); }, []); async function incrementCount() { const response = await contract.increment(); await response.wait(); getCount(); } return ( <div> <h1>Counter DApp</h1> <p>Current Count: {count}</p> <button onClick={incrementCount}>Increment Count</button> </div> ); } export default CounterApp;Connect Your React App to Ethereum - In your
srcfolder, openApp.jsand include the following code to connect your React app to the Ethereum network:import { useEffect } from 'react'; import './App.css'; import CounterApp from './CounterApp'; function App() { useEffect(() => { async function loadEthereum() { if (window.ethereum) { console.log(await window.ethereum.send('eth_requestAccounts')); } } loadEthereum(); }, []); return ( <div className="App"> <CounterApp /> </div> ); } export default App;Wallet Setup - Additionally, you may need to configure and connect your MetaMask or another Ethereum wallet to the DApp for transactions to function correctly. If you haven't set up MetaMask and added some test ETH in Sepolia Testnet, please refer to our previous article on MetaMask for detailed instructions on how to do so
Run Your DApp: Start your React application using
npm startThis will open your DApp in a web browser, allowing you to interact with the smart contract. You can increment the count and view the updated count on the DApp

That's it! You've successfully created the Counter DApp that allows users to get latest count and increment a counter on the Ethereum blockchain using Ethers library and Wallet ( Metamask).

Conclusion
In this guide, we've explored the world of Decentralized Applications (DApps) in the Ethereum ecosystem. DApps operate within decentralized networks, utilizing blockchain technology to eliminate the need for central authorities. We delved into their architecture, and components like smart contracts, and demonstrated the creation of a simple React DApp, the Counter DApp.
If you have any questions, thoughts, or topics you'd like us to cover in the comments, please feel free to share your ideas. We value your input and are eager to tailor our content to your interests and queries.
We trust that the Ethereum Essentials series serves as a valuable resource in unraveling the complexities of blockchain technology. Your dedication to learning and inquisitiveness are the driving forces behind unlocking the true potential of Ethereum. Whether you're a newcomer or a seasoned enthusiast, may this series continue to guide you on your journey through the captivating world of decentralized possibilities.
Disclaimer: It's important to remember that cryptocurrency investments carry inherent risks. Exercise due diligence and caution when managing your digital assets, and always stay informed about the latest developments in the crypto space.
Happy learning and happy exploring the world of Ethereum!